3D建模学习工作室
首页
关于
在线工具
3D建模插件
3D模型自动纹理开发包
在线材质纹理工具
合成数据生成器
3D软件
3D建模
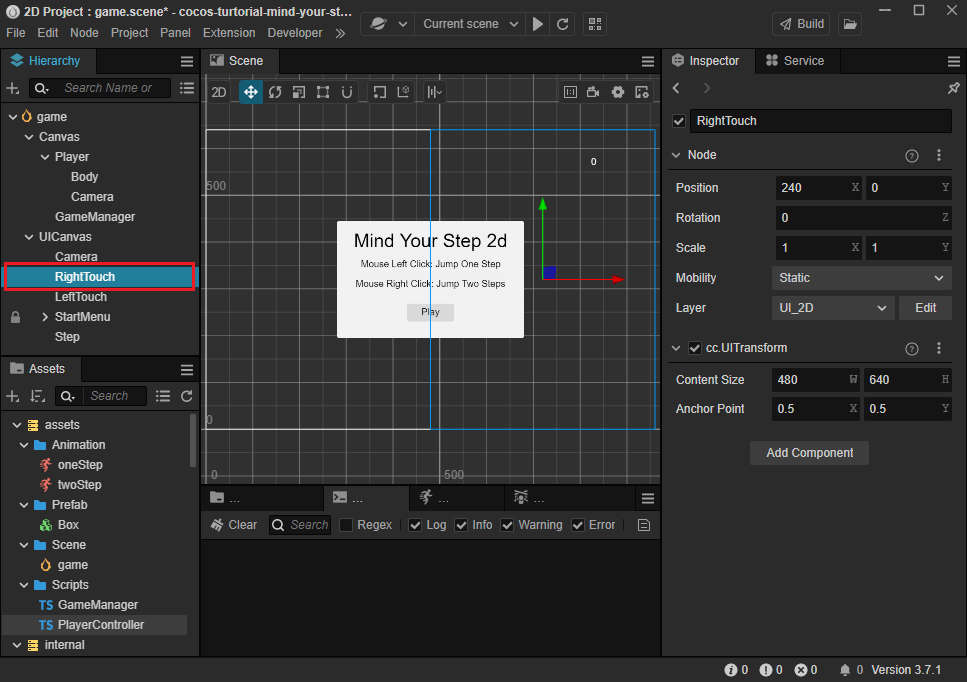
Cocos Creator:处理触摸事件
ygtu
Apr 20, 2023
•
4 min read